Train models like a pro with NVIDIA TLT 3.0
Train fast and accurate computer vision models with NVIDIA’s Transfer Learning Toolkit 3.0; a no-code interface to train and deploy models with TensorRT acceleration.

You find yourself staring at your RGB backlit keyboard, with a task at hand and a model to train. You know you need to modify one of your older scripts to use a different network and export a model. Or maybe you’re the new kid on the block, and stepping into the field of AI seems to be overwhelming, due to the complex environment setup and library usage.

Whether you’re a novice or expert, we would all love a tool that streamlines the process of training, pruning and exporting a plethora of different neural networks that can be used for classification, object detection or segmentation. NVIDIA’s new and shiny Transfer Learning Toolkit 3.0 brings these features to the table in a no-code like fashion. With minimal setup and a couple of commands, you can start training jobs that are powered by Keras under the hood! TLT also helps in pruning the model, which can greatly reduce the size and increase inference speeds and exporting them as a TensorRT engine file, which supercharges your model performance on NVIDIA GPUs.
Introduction
This blog will help you set-up dependencies for TLT 3.0 and run through examples of training, pruning, re-training and exporting your models. (Perhaps dive into INT8 optimization too!) This might be a long blog, so brace yourselves. I will include pictures along the way to hold on to your attention! Just kidding.
Install Dependencies
Assuming you are running Ubuntu 20.04 LTS, you will need CUDA 11.2, nvidia-docker and a few other dependencies.
CUDA 11.2
Begin with downloading the deb file from the CUDA repository based on your platform.

Once you have selected your platform appropriately, you will be provided installation commands. If your platform is similar to that of mine, you can install it as follows —
wget https://developer.download.nvidia.com/compute/cuda/repos/ubuntu2004/x86_64/cuda-ubuntu2004.pinsudo mv cuda-ubuntu2004.pin /etc/apt/preferences.d/cuda-repository-pin-600wget https://developer.download.nvidia.com/compute/cuda/11.2.1/local_installers/cuda-repo-ubuntu2004-11-2-local_11.2.1-460.32.03-1_amd64.debsudo dpkg -i cuda-repo-ubuntu2004-11-2-local_11.2.1-460.32.03-1_amd64.debsudo apt-key add /var/cuda-repo-ubuntu2004-11-2-local/7fa2af80.pubsudo apt updatesudo apt -y install cudasudo reboot
If done right, you should have the following output when you run nvidia-smi

Docker
Docker is a platform that helps in the containerization of apps by providing OS-level virtualization.
First, uninstall any older versions you may have lingering on your device —
sudo apt-get remove docker docker-engine docker.io containerd runcGet dependencies that will allow you to use the apt repository
sudo apt-get update

sudo apt-get install \
  apt-transport-https \
  ca-certificates \
  curl \
  gnupg
Add docker’s official GPG key
curl -fsSL https://downloads.docker.com/linux/ubuntu/gpg | sudo gpg — dearmor -o /usr/share/keyrings/docker-archive-keyring.gpgAdd the repository to apt
echo \
  "deb [arch=amd64 signed-by=/usr/share/keyrings/docker-archive-keyring.gpg] https://download.docker.com/linux/ubuntu \
  $(lsb_release -cs) stable" | sudo tee /etc/apt/sources.list.d/docker.list > /dev/null
Now, install the docker-engine
sudo apt-get update
sudo apt-get install docker-ce docker-ce-cli containerd.io
Verify by running the hello-world container
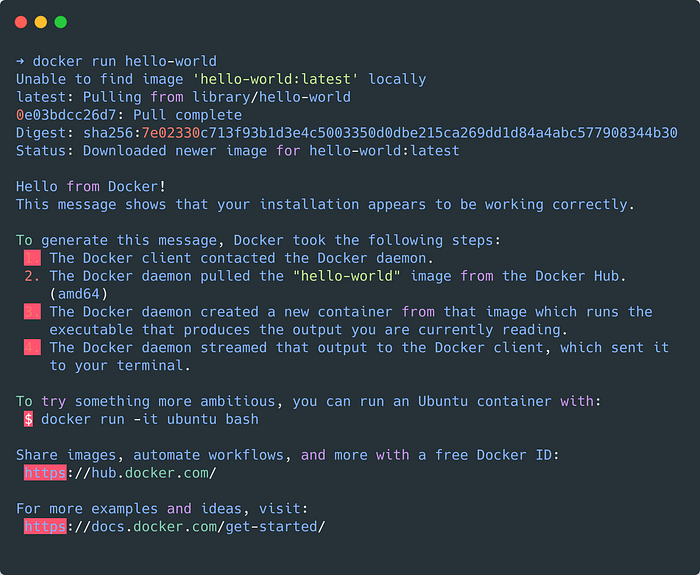
sudo docker run hello-worldIf done correctly, you should see an output like so —
Psst! Let’s remove the need for using sudo with docker commands
sudo groupadd docker
sudo usermod -aG docker $USER
newgrp docker
With this, you will no longer find the need for super-user control when using docker!
nvidia-docker2
nvidia-docker2 helps to bridge the GPU to docker containers.
distribution=ubuntu20.04curl -s -L https://nvidia.github.io/nvidia-container-runtime/experimental/$distribution/nvidia-container-runtime.list | sudo tee /etc/apt/sources.list.d/nvidia-container-runtime.listsudo apt-get updatesudo apt-get install -y nvidia-docker2sudo systemctl restart dockersudo docker run --rm --gpus all nvidia/cuda:11.0-base nvidia-smi
TLT Python packages
These python packages help in pulling containers and mounting targets.
sudo apt install python3-dev python3-pip
pip3 install nvidia-pyindex
pip3 install nvidia-tlt
pip3 install jupyter
NVIDIA container registry login
This step is vital to access containers from NVIDIA. Sign up at https://ngc.nvidia.com/signin and generate an API Key to login.
docker login nvcr.ioEnter your username as $oauthtoken and for password use your NGC API Key.
This marks the end of setting up dependencies. Now you should be all set to get your hands dirty and train models!
Train your first model!

NVIDIA provides a curated resource of all training notebooks, however I have simplified one of them to get you onboarded quickly! I have picked up classification as an example, and you’ll be training a model to classify between cats and dogs! Yes, my love for our furry friends seeps into everything I do. The warmth and love they bring along are unmatched. Heck, I even have one of my cats sitting next to me while I’m writing this blog! 💖
Don’t tell me you didn’t see this coming from the blog title image.
Go ahead and clone the repository —
# SSH
git clone git@github.com:aj-ames/nvidia-tlt-get-started.git# HTTPS
git clone https://github.com/aj-ames/nvidia-tlt-get-started.git
Download the dataset from here and unzip it in thedata directory.
➜ tree
.
├── train
│   └── cat
│       └── ...
│   └── dog
│       └── ...
├── val
│   └── cat
│       └── ...
│   └── dog
│       └── ...
├── test
│   └── ...
Initiate jupyter and open the URL in a browser (if it doesn’t auto-open it for you)
jupyter notebook --ip 0.0.0.0 --port 8888 --allow-rootOpen get_started_classification.ipynb and follow the instructions to start training!

Experiment yourself?
Remember I mentioned that NVIDIA has a repository of scripts? Go ahead and download it in the following way —
wget --content-disposition https://api.ngc.nvidia.com/v2/resources/nvidia/tlt_cv_samples/versions/v1.0.2/zip -O tlt_cv_samples_v1.0.2.zipunzip -u tlt_cv_samples_v1.0.2.zip -d ./tlt_cv_samples_v1.0.2 && rm -rf tlt_cv_samples_v1.0.2.zip && cd ./tlt_cv_samples_v1.0.2
Here you will find all sample training scripts ranging from classification to different object detectors like YOLO and Retinanet!
➜ tree
.
├── augment
│   ├── augment.ipynb
│   └── specs
│       └── default_spec.txt
├── classification
│   ├── classification.ipynb
│   └── specs
│       ├── classification_retrain_spec.cfg
│       └── classification_spec.cfg
├── deps
│   └── requirements-pip.txt
├── detectnet_v2
│   ├── detectnet_v2.ipynb
│   ├── __init__.py
│   └── specs
│       ├── detectnet_v2_inference_kitti_etlt_qat.txt
│       ├── detectnet_v2_inference_kitti_etlt.txt
│       ├── detectnet_v2_inference_kitti_tlt.txt
│       ├── detectnet_v2_retrain_resnet18_kitti_qat.txt
│       ├── detectnet_v2_retrain_resnet18_kitti.txt
│       ├── detectnet_v2_tfrecords_kitti_trainval.txt
│       └── detectnet_v2_train_resnet18_kitti.txt
├── dssd
│   ├── dssd.ipynb
│   ├── __init__.py
│   └── specs
│       ├── dssd_retrain_resnet18_kitti.txt
│       ├── dssd_tfrecords_kitti_trainval.txt
│       └── dssd_train_resnet18_kitti.txt
├── emotionnet
│   ├── ckplus_convert.py
│   ├── dataset_specs
│   │   └── dataio_config_ckplus.json
│   ├── emotionnet.ipynb
│   └── specs
│       ├── emotionnet_tlt_pretrain.yaml
│       └── emotionnet_tlt.yaml
├── facenet
│   ├── convert_wider_to_kitti.py
│   ├── facenet.ipynb
│   └── specs
│       ├── facenet_inference_kitti_etlt.txt
│       ├── facenet_inference_kitti_tlt.txt
│       ├── facenet_retrain_resnet18_kitti.txt
│       ├── facenet_tfrecords_kitti_train.txt
│       ├── facenet_tfrecords_kitti_val.txt
│       └── facenet_train_resnet18_kitti.txt
├── faster_rcnn
│   ├── faster_rcnn.ipynb
│   └── specs
│       ├── default_spec_darknet19.txt
│       ├── default_spec_darknet53.txt
│       ├── default_spec_efficientnet_b0.txt
│       ├── default_spec_googlenet.txt
│       ├── default_spec_mobilenet_v1.txt
│       ├── default_spec_mobilenet_v2.txt
│       ├── default_spec_resnet101.txt
│       ├── default_spec_resnet10.txt
│       ├── default_spec_resnet18_grayscale.txt
│       ├── default_spec_resnet18_retrain_spec.txt
│       ├── default_spec_resnet18.txt
│       ├── default_spec_resnet34.txt
│       ├── default_spec_resnet50.txt
│       ├── default_spec_vgg16.txt
│       ├── default_spec_vgg19.txt
│       └── frcnn_tfrecords_kitti_trainval.txt
├── fpenet
│   ├── data_utils.py
│   ├── fpenet.ipynb
│   ├── __init__.py
│   └── specs
│       ├── dataset_config.yaml
│       ├── experiment_spec.yaml
│       └── inference_sample.json
├── gazenet
│   ├── face_model_nv68.py
│   ├── gazenet.ipynb
│   ├── mpiifacegaze_convert.py
│   ├── sample_labels
│   │   └── data_factory.zip
│   ├── specs
│   │   ├── gazenet_tlt_pretrain.yaml
│   │   └── gazenet_tlt.yaml
│   └── utils_gazeviz.py
├── gesturenet
│   ├── convert_hgr_to_tlt_data.py
│   ├── gesturenet.ipynb
│   ├── __init__.py
│   └── specs
│       ├── dataset_config.json
│       ├── dataset_experiment_config.json
│       └── train_spec.json
├── heartratenet
│   ├── heartratenet.ipynb
│   ├── process_dataset.py
│   └── specs
│       ├── heartratenet_data_generation.yaml
│       └── heartratenet_tlt_pretrain.yaml
├── lprnet
│   ├── download_and_prepare_data.sh
│   ├── lprnet.ipynb
│   ├── preprocess_openalpr_benchmark.py
│   └── specs
│       ├── tutorial_spec_scratch.txt
│       ├── tutorial_spec.txt
│       └── us_lp_characters.txt
├── mask_rcnn
│   ├── maskrcnn.ipynb
│   └── specs
│       ├── coco_labels.txt
│       ├── create_coco_tf_record.py
│       ├── download_and_preprocess_coco.sh
│       └── maskrcnn_train_resnet50.txt
├── retinanet
│   ├── generate_val_dataset.py
│   ├── __init__.py
│   ├── retinanet.ipynb
│   └── specs
│       ├── retinanet_retrain_resnet18_kitti.txt
│       └── retinanet_train_resnet18_kitti.txt
├── ssd
│   ├── generate_val_dataset.py
│   ├── __init__.py
│   ├── specs
│   │   ├── ssd_retrain_resnet18_kitti.txt
│   │   ├── ssd_tfrecords_kitti_trainval.txt
│   │   └── ssd_train_resnet18_kitti.txt
│   └── ssd.ipynb
├── unet
│   ├── prepare_data_isbi.py
│   ├── prepare_data.sh
│   ├── specs
│   │   └── unet_train_resnet_unet_isbi.txt
│   ├── unet_isbi.ipynb
│   └── vis_annotation.py
├── yolo_v3
│   ├── __init__.py
│   ├── specs
│   │   ├── yolo_v3_retrain_resnet18_kitti.txt
│   │   └── yolo_v3_train_resnet18_kitti.txt
│   └── yolo_v3.ipynb
└── yolo_v4
    ├── __init__.py
    ├── specs
    │   ├── yolo_v4_retrain_resnet18_kitti.txt
    │   └── yolo_v4_train_resnet18_kitti.txt
    └── yolo_v4.ipynb39 directories, 108 files
So what’s next?
To read more about TLT 3.0, you can go to https://developer.nvidia.com/transfer-learning-toolkit.
Now that you have the setup up and running, you would love to train more complex models and run inference on them! 😈 In my next blog, I will show you how to train your very own object detector using TLT 3.0 and plug it into Deepstream 5.1. Until then, stay safe!